Online Manual
Interface Translation Guide
Overview
AD Group Manager Web provides a robust UI translation system that allows you to customize text elements throughout the application to match your organization’s language preferences. This feature is useful for non-English environments or organizations that prefer specific terminology.
How to Access Interface Customization
- Log in as an administrator
- Navigate to the administration menu
- Select “Interface Customization”

Understanding Translation Categories
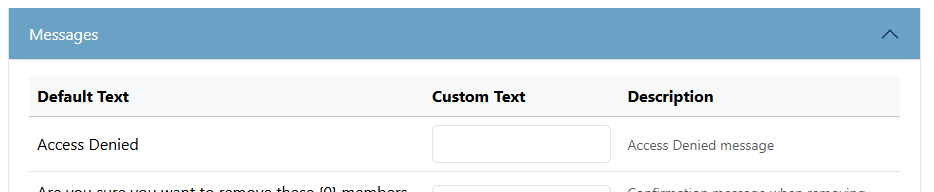
The translation interface is organized into several categories:
- Buttons - Text on all buttons (OK, Cancel, Save, etc.)
- Messages - Notification and alert messages
- Labels - Field labels and static text elements
- Login - Text on the login screen
- Field Names - Names of data fields in groups and members
- Branding - Application title, tagline, and other branding elements
How to Translate UI Elements
- Navigate to the appropriate category tab
- Find the text element you want to customize
- Enter your translated text in the “Custom Text” field
- Click “Save all changes” at the bottom of the page
All translations are applied immediately - no application restart is required.
Multi-language Support
Using Built-in Language Presets
AD Group Manager Web includes built-in language presets to quickly translate the entire interface:
- Click the “Initialize French” button to apply French translations
- Click the “Initialize German” button to apply German translations
These presets provide a starting point that you can further customize as needed.
Creating Custom Language Sets
You can create your own complete language set by:
- Clicking “Initialize French” or “Initialize German” to get a complete set of translations
- Modifying each element to match your target language
- Saving your changes
Resetting Translations
To revert all customizations and return to the default English text:
- Click the “Reset All to Defaults” button
- Confirm the action
How Translations Work
Translations are stored in the application database and applied dynamically when UI elements are rendered. The translation system:
- Attempts to use a custom translation if available
- Falls back to the default text if no custom translation exists
- Applies HTML entity decoding to preserve special characters
Important Considerations
Special Characters
When using languages with special characters (like é, ü, ñ), the system automatically handles encoding/decoding to ensure proper display.
HTML Elements
Translations should be plain text only and should not include HTML tags. The application handles all formatting.
Character Length
Be mindful of translation length. Very long translations may not display properly in buttons or narrow UI elements. Test your translations to ensure they fit properly.
Dynamic Content
Some UI elements contain dynamic content with placeholders like {0} or {1}. When translating these elements, preserve these placeholders exactly as they appear in the original text.
How to Translate Grid Components
The application’s data grids have special translation handling for components like the column chooser dialog. These elements are translated when:
- First loading the page
- Opening the column chooser dialog
- Changing column visibility
Troubleshooting
Translations Not Displaying
If translations are not appearing:
- Verify your changes were saved (confirm the success message)
- Try refreshing the browser cache (Ctrl+F5)
- Check that you’re editing the correct text item (search for the exact text you want to change)
- Ensure special characters are properly entered
Reverting Specific Translations
To revert a single translation:
- Clear the “Custom Text” field for that item
- Save changes
This will restore the default text for just that element.
Examples
Button Translations
Default: “Add members” → Custom: “Ajouter des membres”
Label Translations
Default: “Group Name” → Custom: “Nombre del grupo”
Column Chooser Dialog
Default dialog elements and their customizable components:
- “Choose Column” header → Custom header text
- “Search” placeholder → Custom search text
- “Select All” checkbox → Custom select all text
- “OK” and “Cancel” buttons → Custom button text
Best Practices
- Maintain Consistency - Use consistent terminology across all translations
- Test Thoroughly - View each page after translation to ensure proper display
- Document Changes - Keep a record of your customizations for future reference
- Consider Context - Some words may have different translations depending on context
- Preserve Placeholders - Maintain any
{0},{1}placeholders in translated text
By following this guide, you can fully customize the AD Group Manager Web interface to meet your organization’s language requirements and terminology preferences.