Online Manual
Customizing Reports
AD FastReporter allows you to customize existing reports and create new ones to meet your specific requirements.

Modifying Field Selection
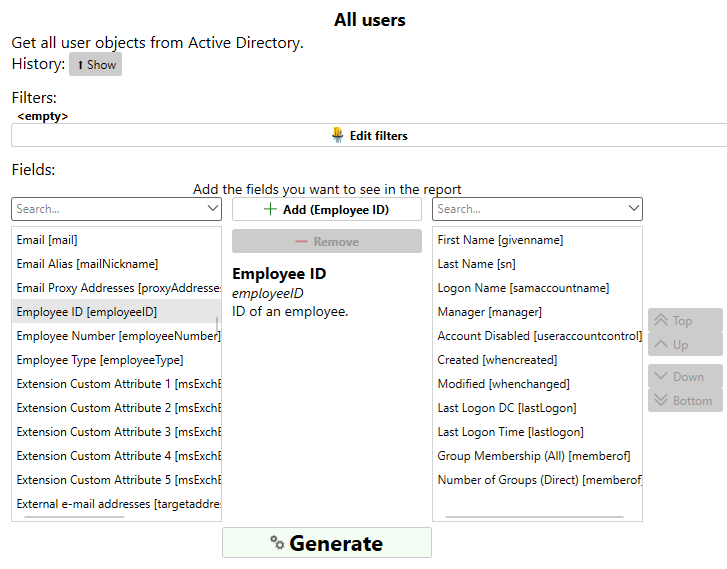
To change which fields (attributes) are included in a report:
- Select a report template
- In the Fields section, you'll see two lists:
- Available Fields - Fields that can be added to the report
- Selected Fields - Fields that will be included in the report
- To add a field:
- Select a field from the Available Fields list
- Click the "Add" button
- To remove a field:
- Select a field from the Selected Fields list
- Click the "Remove" button
- To change the order of fields:
- Select a field in the Selected Fields list
- Use the "Up", "Down", "Top", or "Bottom" buttons to reposition it
When you select a field, its description will be displayed in the center panel to help you understand what information it contains.
Creating Custom Filter Expressions (Pro Version)
In the Pro version, you can create custom filter expressions to define exactly which objects to include in your report.
Creating a New Custom Report
- Click the "NEW REPORT" button in the sidebar
- Select the type of objects you want to report on (Users, Computers, Groups, etc.)
- Enter a name and description for your report
- Define your filter criteria
Working with Filters
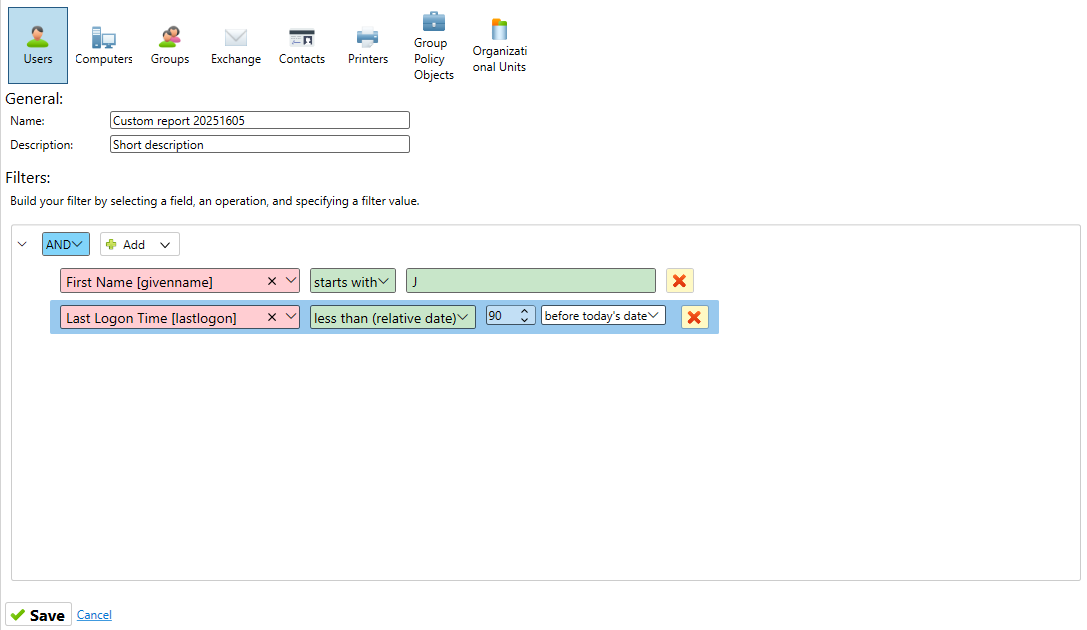
The filter builder allows you to create complex conditions:
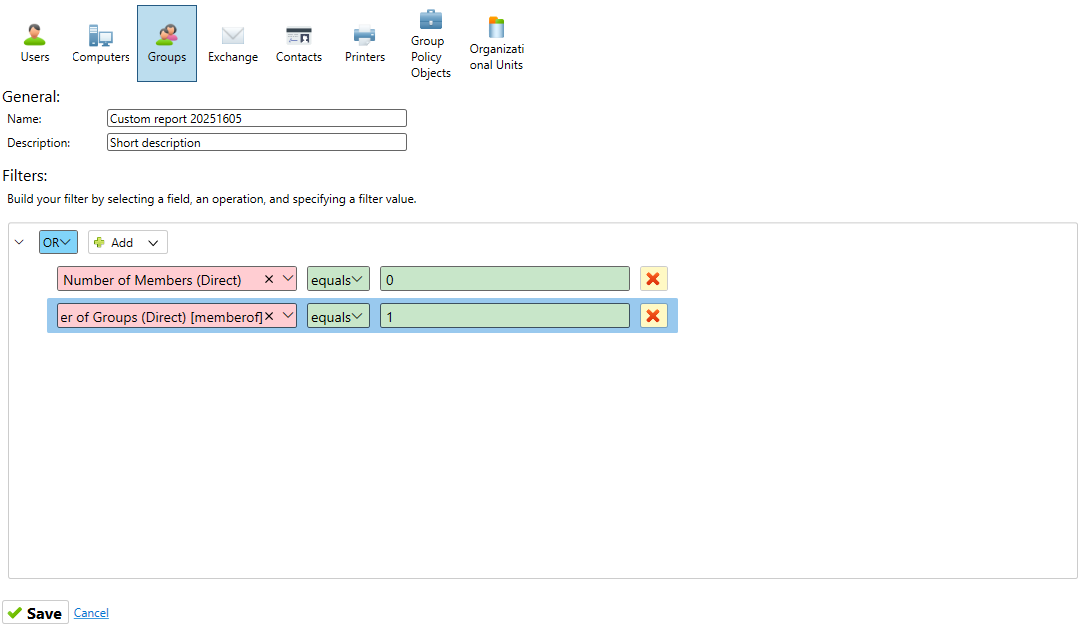
- Filter Groups - Collections of criteria with AND/OR logical operators
- Filter Criteria - Individual conditions based on AD attributes
Building Filter Expressions
- Start with the root filter group (AND/OR)
- Add criteria by clicking "Add" then "Criteria"
- For each criterion:
- Select a field from the dropdown
- Choose an operation (equals, contains, starts with, etc.)
- Enter a value to compare against
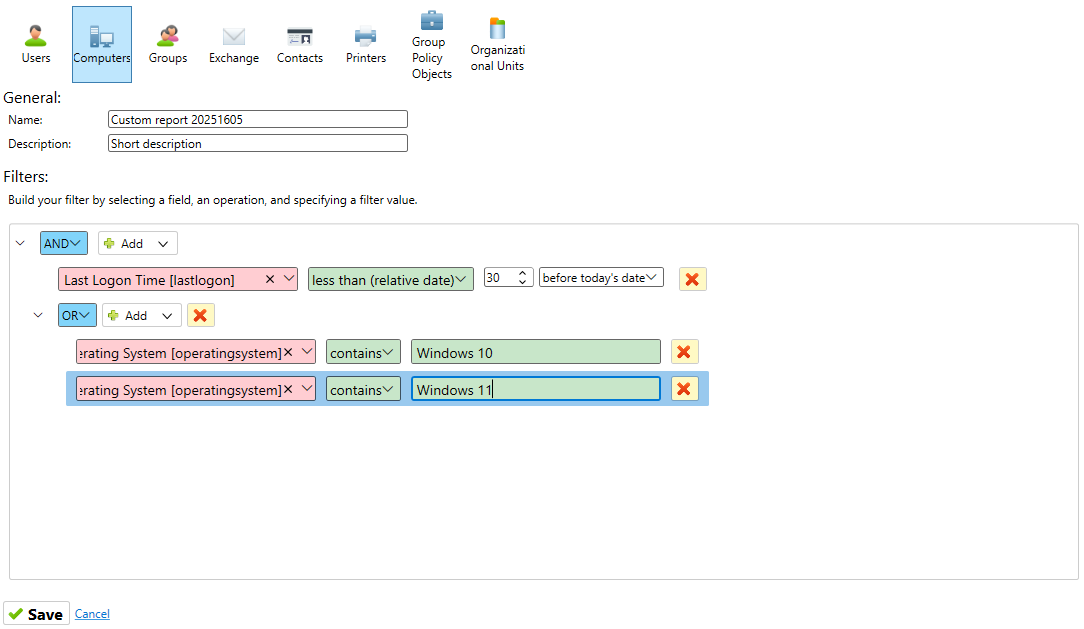
- Add nested groups by clicking "Add" then "Group"
- Repeat the process to build complex expressions
- Remove criteria or groups using the delete button
Example filter expressions:
- Users whose name starts with "J" AND who have not logged in for 90 days
- Computers with Windows 10 OR Windows 11 AND joined to the domain in the last 30 days
- Groups that are empty OR have only one member


Saving Custom Reports
After customizing a report:
- Click the "Save" button
- Your custom report will be saved in the "Custom Report Forms" section of the appropriate category
Custom reports can be accessed just like built-in reports and will appear in the report list.
Editing Existing Custom Reports
To modify a custom report you've previously created:
- Find the report in the report list
- Right-click on it and select "Edit report form"
- Make your changes to the name, description, filter, or fields
- Click "Save" to update the report
Note: Built-in report templates cannot be directly edited. Instead, you can duplicate them to create a custom version that you can modify.
Duplicating Reports
To create a new report based on an existing one:
- Find the report you want to use as a template
- Right-click on it and select "Duplicate"
- A new report form will open with the same settings
- Make your changes to the name, description, filter, or fields
- Click "Save" to create the new report
This is particularly useful when you want to create a variation of a built-in report or when you want to preserve an existing custom report while creating a similar one.
Managing Favorite Reports
To mark a report as a favorite for quick access:
- On the Home screen, select a report from the search results
- Click the "Favorite" button
- The report will now appear in the "FAVORITE" section on the Home screen
To remove a report from your favorites:
- In the "FAVORITE" section, click "Remove?" next to the report name
- The report will be removed from your favorites but remains available in the reports list