Online Manual
Generating Reports
This section explains how to generate reports and work with the results.
Running a Report
To generate a report:
- Select a report from the list of available templates
- Review the report details including description, fields, and filters
- Make any adjustments to the fields if needed
- Click the "Generate" button
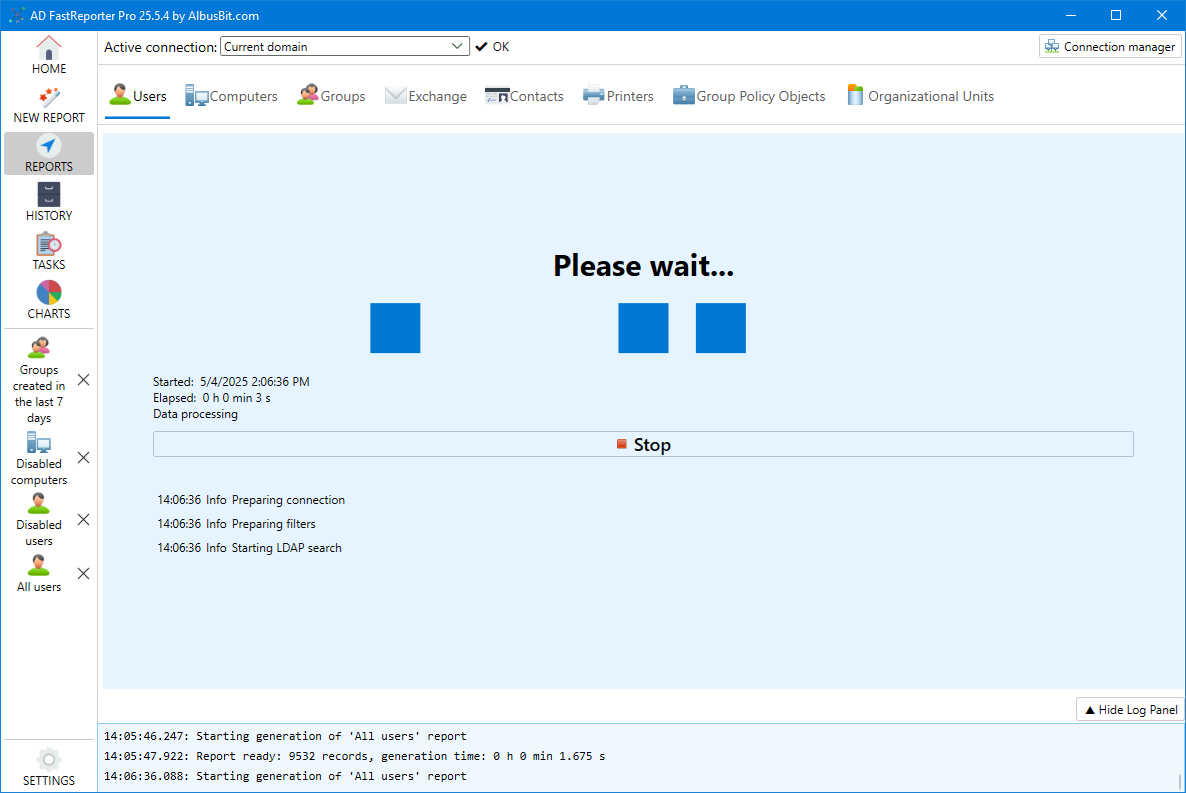
The report will begin running and a progress indicator will be displayed. The time required depends on the complexity of the report and the size of your Active Directory.
Report Generation Progress
While a report is being generated, you'll see:
- A progress indicator showing that the report is running
- The elapsed time since the report started
- Current operation being performed
- A log of operations that have been completed
- A "Stop" button to cancel the report generation if needed

Viewing Report Results
Once the report has completed, the results will be displayed in a grid:
- Columns represent the fields you selected for the report
- Each row represents an AD object that matched your report criteria
- The title of the report is displayed at the top
- The number of records found is indicated
If no results are found, you'll see a message indicating that no matching records were discovered.
Working with Report Results
Sorting
To sort the report results:
- Click on a column header to sort by that column
- Click again to reverse the sort order
- You can sort by multiple columns by holding Shift and clicking additional column headers
Filtering
To filter the displayed results:
- Click the filter icon in the column header
- Enter filter criteria in the search box
- Use the dropdown to select filter conditions (equals, contains, starts with, etc.)
Searching
To search within the results:
- Enter your search term in the search box above the grid
- Click "Find next" or press F3 to locate matches
- Use Shift+F3 to search backwards
- Check the "Filter" checkbox to show only matching rows
Adjusting Column Width
To adjust how columns are displayed:
- Drag the column dividers to resize individual columns
- Click "Expand all columns" to automatically size columns to fit their content
Exporting Report Results (Pro Version)
In the Pro version, you can export the report results in various formats:
- Click the "Export" dropdown button
- Select the desired format:
- XLSX - Excel spreadsheet
- CSV - Comma-separated values (standard or append mode)
- PDF - Portable Document Format
- HTML - Web page format
- XML - Extensible Markup Language
- ODS - OpenDocument Spreadsheet
- JSON - JavaScript Object Notation
After selecting a format, you'll be prompted to choose a location to save the file.
Saving Reports to History (Pro Version)
In the Pro version, reports are automatically saved to the history so you can access them later. You can:
- View a list of previously generated reports in the History section
- Reload past reports without having to regenerate them
- See metadata such as when the report was created and how many records it contained
Error Handling
If errors occur during report generation, you'll see:
- An error message explaining what went wrong
- The error will be recorded in the application log
- You may still get partial results if some data was successfully retrieved
Common errors include insufficient permissions, network connectivity issues, or timeout problems with large domains.